Whole-home filters can filter water as it enters the residence, but you might not have access to the main water line if you live in an apartment. Despite this setback, you can still filter your shower water to protect your skin, nails, and hair. Simply install a built-in showerhead filter or an in-line filter underneath the showerhead.
A shower filter is a smart purchase if the water in your house or neighbourhood is hard or contains a lot of chemical additives. Find out here how to install a shower filter.

1.Take the off showerhead.
The showerhead must be taken off the shower arm as the initial step in the procedure. The showerhead can usually be removed by simply unscrewing it with your hands, but if it appears stuck, you may need to use a set of channel locks to loosen the nut holding it to the shower arm.
In a secure area, set the showerhead to the side for reinstallation after rotating it counterclockwise until it is entirely free of the shower arm.

2.Shower arm cleaning and thread wrapping
Examine the shower arm’s threads and eliminate any lingering plumber’s or Teflon tape to ensure they are entirely clean. Use fresh plumber’s tape to wrap the shower arm’s threads to assist.

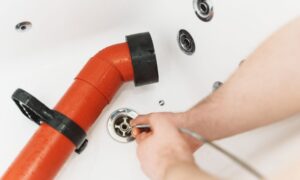
3.The shower Filter should be connected to the shower arm.
Installing an in-line shower filter is simple. To make the shower filter screw onto the shower arm threads, simply align the shower filter nut with the shower arm. After hand-tightening the shower filter, turn the nut a further 1/4 to 1/2 without overtightening it using your channel locks or pliers.

4.Get rid of the shower filter.
Ne shower filters should be flushed to get rid of any sediment, dust, filth, or packing materials that might have gathered inside the filter. You should, thus, switch on the cold water and let it flow for about five minutes before replacing the showerhead. You can catch the water in a bucket or let it drip into the shower.
Turn on the hot water slowly and wait another five minutes before turning it back on.

5.Showerhead replacement
Screwing the showerhead back onto the shower filter threads will reattach it. After hand-tightening the showerhead, use a set of channel locks or pliers to turn the connection a 1/4- or 1/2-turn. To ensure all debris and impurities are flushed out of the showerhead before anyone uses the shower, it is advised to repeat the flushing procedure if this is a new showerhead.

6.Examine for leaks
To check for leaks, look at the connection between the shower filter and the showerhead. Check for leaks at the connection where the shower filter meets the arm by turning on the water. If you see any leaks, you might need to further tighten the shower filter or showerhead.