A tub drain has several benefits, including a built-in pop-up stopper. Compared to pop-up stoppers, which work by a trip lever and a linkage that runs through the overflow tube, this type of stopper, which is operated by hand or foot, is more reliable and requires less maintenance. Additionally, a stopper drain fitting helps update your fixture if you have an outdated tub with a rubber stopper secured by a chain.
In addition to a blank cover for the overflow opening to replace the trip-lever cover plate used with the original stopper assembly, drain converter kits include a threaded drain fitting with a built-in stopper plug. Several designs use grip knobs that are opened and closed by lifting or lowering by hand and spring-loaded stoppers that close and open with a simple push of the toe.

Follow the below steps to install a stopper in a bathtub:
1. Remove the Old Stopper and Linkage
The overflow hole’s cover plate should be removed, and carefully remove the stopper’s level rod and linkage from the opening if you’re replacing a conventional lever-operated stopper. Replace the overflow cover right away with the blank cover that came with the new stopper kit.

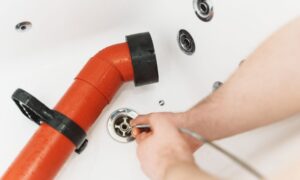
2. Remove the Old Bathtub Drain Fitting
Choose the end of the wrench that will fit around the crosshairs of the drain fitting and inside the drain opening first. Use an adjustable wrench to turn the drain fitting counterclockwise and loosen the fitting after inserting the wrench into the tub drain and lining it up with the crosshairs. Turn the fitting until it releases.

3. Clean the Tub Drain Opening
Clean the plumber’s putty ring that surrounds the tub drain opening before removing the fitting from the tub. Remove as much putty as possible because it is better to work with a clean surface. You can remove the dried-on plumber’s putty using a non-scratch scouring pad.

4. Determine the Drain Thread Size
To estimate the size of your drain, use the old fitting. A bathtub drain converter kit often includes two sizes of drain threads to accommodate various tub drains. Choose the right thread attachment.

5. Install the New Drain Fitting
It is frequently sufficient to unscrew the tub stopper from the new drain fitting to remove it. Putty the new fitting’s flange’s bottom with a thick layer of plumber’s putty. Centre the fitting before inserting it into the bathtub drain opening.
Make sure you gently thread the fitting into the shoe. Starting the tightening process by hand is a great technique to prevent cross-threading. You can continue tightening with the tub drain wrench after it appears that the fitting’s threads are screwing into the drain shoe properly.
Finally, remove any extra plumber’s putty from the area around the drain fitting, affix the stopper, and run a drain test.